
A single sealing error at a crime scene can render critical evidence inadmissible in court, jeopardizing months of forensic investigation. Every piece of evidence collected tells a story, but only if it reaches the courtroom in its original, untampered state. Preserving the integrity of evidence begins the moment it is collected, demanding strict adherence to chain of custody protocols and the use of certified tamper-evident bags.
This 2026 guide breaks down the forensic standards for labeling and sealing evidence bags, outlining the exact physical barriers required to prevent cross-contamination and defeat unauthorized tampering.
Why Proper Evidence Bag Sealing is Critical for Legal Admissibility
Proper labeling and sealing of evidence bags are foundational to maintaining the chain of custody. The chain of custody is the chronological paper trail that documents every person who has handled the evidence, from the moment of collection to its presentation in court.
Failing to label or seal an evidence bag properly can have severe consequences for your investigation:
- Biological Contamination: An improper seal can allow external contaminants in or cause biological evidence to degrade rapidly, permanently compromising DNA findings.
- Undetected Tampering: Without highly engineered tamper-evident seals, a standard bag could be opened and its contents altered or stolen without any clear visual indication.
- Court Inadmissibility: Defense attorneys heavily scrutinize evidence integrity. Any gap in the chain of custody or improper sealing technique will lead to that evidence being challenged and completely excluded from trial.
Ensuring meticulous labeling and using reliable physical sealing methods are non-negotiable practices in forensic evidence handling.
Essential Preparations Before Labeling and Sealing an Evidence Bag
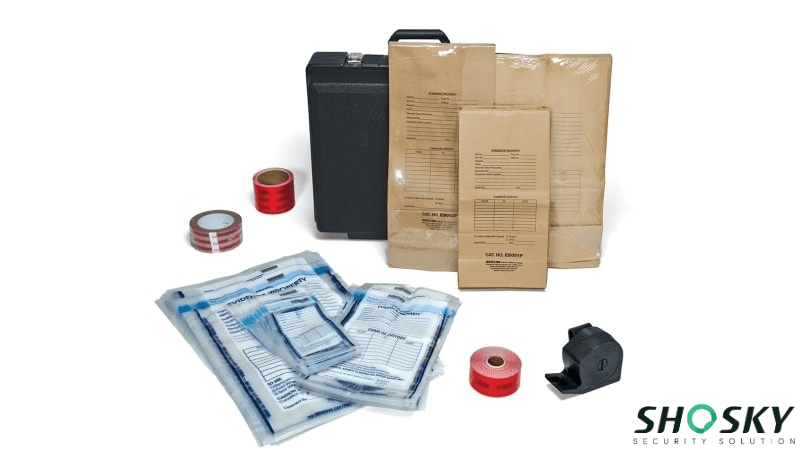
Forensic teams must never process evidence without the correct industrial-grade supplies. Having all your specialized tools ready ensures a secure and uncontaminated collection process.
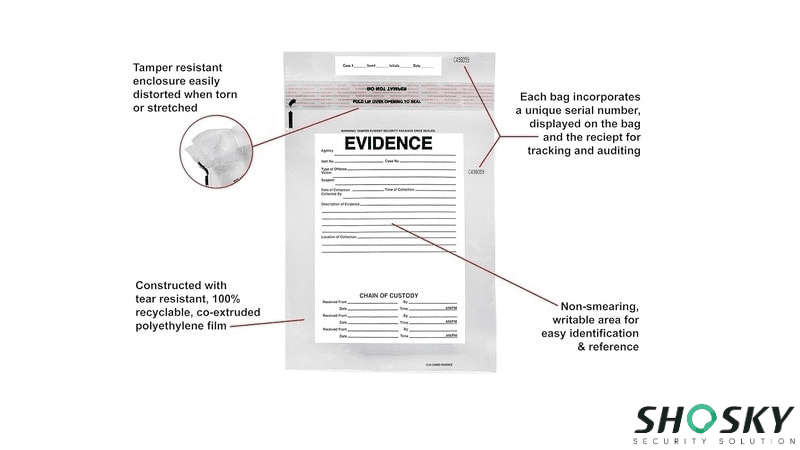
- Appropriate Evidence Bags: Clean, unused breathable Kraft paper bags for biologicals, and heavy-duty co-extruded plastic bags for dry items.
- Tamper-Evident Security Tape: Solvent-based acrylic tape designed to permanently show “VOID” or “OPENED” messages upon removal.
- Destructible Security Labels: Serialized labels that fracture like eggshells if removal is attempted, providing an extra layer of auditing.
- Waterproof Permanent Marker: Essential for writing on low surface energy plastics without smudging or fading over time.
- Clean Nitrile Gloves: Mandatory to prevent DNA cross-contamination; a new pair must be used for each distinct item.
- Chain of Custody Log: The official forensic document required to begin the audit trail immediately upon collection.
These tools form the foundation of proper evidence handling and help ensure that every item collected is protected from contamination, tampering, or loss. By preparing your supplies in advance, you minimize delays and mistakes at the scene, keeping the chain of custody intact from the very first step.
Step-by-Step Guide: How to Label and Seal an Evidence Bag
Forensic procurement and field collection teams must execute these standardized steps to guarantee legal compliance:
Step 1: Select the Right Evidence Bag Material

Before collecting any evidence, select the right evidence bag. Consider the nature of evidence (wet, dry, fragile, etc.) and the required level of security. Prioritize tamper-evident bags whenever possible to provide a clear indication of any tampering. Select a bag of the appropriate size to hold the evidence without excessive folding or crushing comfortably. Here are the types of evidence bags:
- Paper Bags: These are breathable and essential for biological samples (wet or dry), such as bloodstained clothing or plant material. As the National Institute of Justice (NIJ) notes, using paper for wet or damp items prevents moisture buildup, which can lead to mold and degradation.
- Plastic Bags: These are highly durable and ideal for non-biological, dry items like narcotics, firearms, or trace evidence that must be protected from environmental moisture and loss.
The type of evidence dictates the type of bag. Meanwhile, the size of the bag is also important. Select a bag of the appropriate size to hold the evidence without excessive folding or crushing comfortably. After selecting the bags, always ensure the bag is new, clean, and free from any pre-existing markings or contamination.
Step 2: Handle Evidence Correctly with Fresh PPE
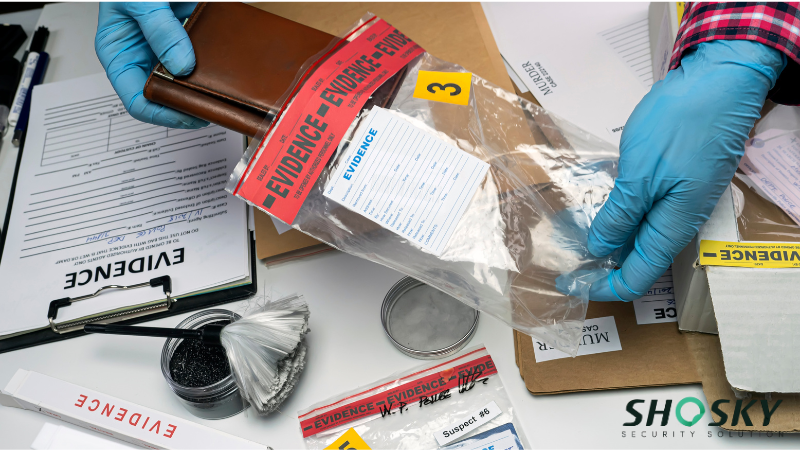
Always wear new, clean nitrile gloves for each item to prevent cross-contamination, smudging, or the transfer of trace materials like skin oils or fingerprints. Replace gloves immediately if they tear or become contaminated during handling. Minimize direct contact with the evidence and document the name of the person collecting the item to ensure transparency.
Step 3: Place Evidence Securely in the Bag
Place only one item per bag unless the items are intrinsically linked. Do not overstuff the bag, as internal pressure can distort delicate items or allow sharp objects to puncture the plastic film. Ensure the evidence is laid flat to maintain its original condition during transit to the crime lab.
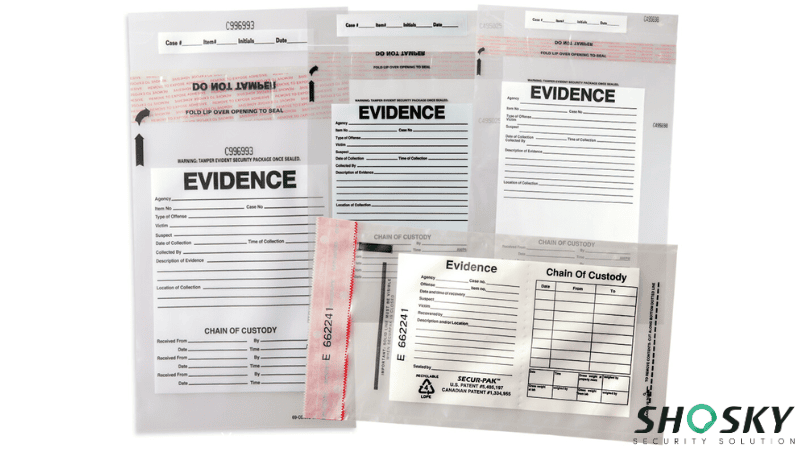
Step 4: Label the Bag Completely and Accurately
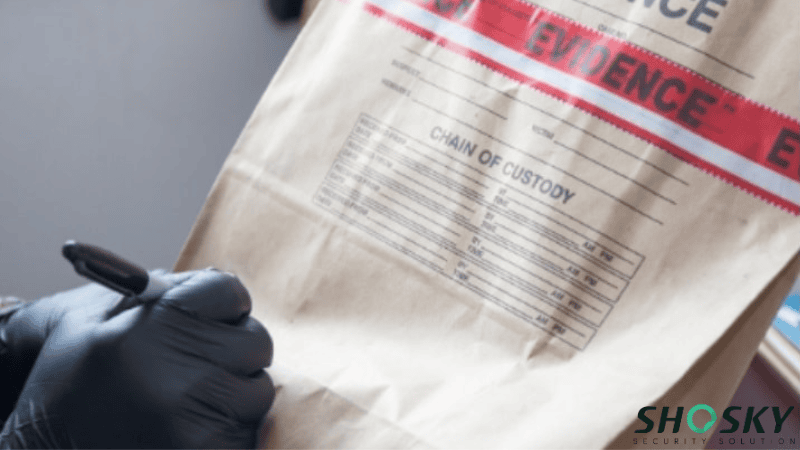
Labeling is a critical part of maintaining the chain of custody. Use a waterproof permanent marker to fill out all required fields before placing the item inside, while the bag is on a flat surface. Essential information includes:
- Case Number & Item Number: The unique sequential identifiers for the specific investigation.
- Date and Time of Collection: The exact chronological timestamp of the seizure.
- Location of Collection: The precise physical coordinates or room where the evidence was found.
- Brief Description of Contents: A concise, factual description (e.g., “One broken knife”). Avoid overly detailed assumptions.
- Collector’s Name and Initials: The printed name and signature of the seizing officer.
These details are a standard part of forensic documentation, as outlined in guides like the California DOJ’s Physical Evidence Bulletin. It’s worth noting that the label should be permanently affixed to the bag, ideally using a waterproof marker.
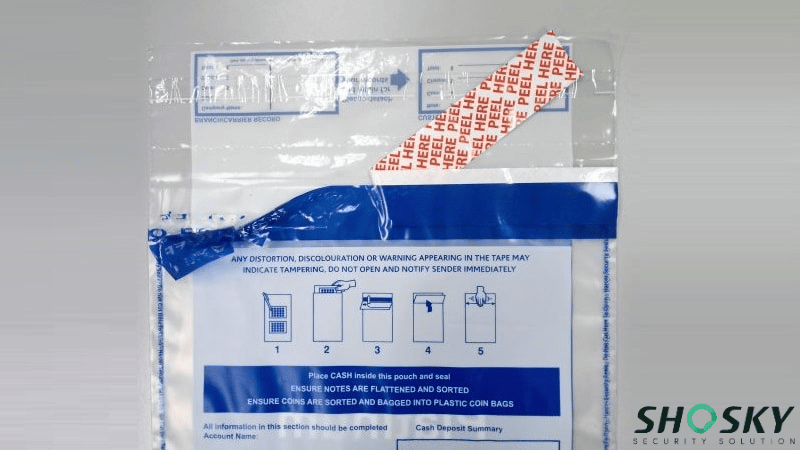
Step 5: Seal the Bag Using Tamper-Evident Methods
This is the most critical physical security step. Applying security labels and solvent-based tamper-evident tape provides a highly engineered layer of protection.
- Fold the Bag Opening: For paper bags, fold the top edge down at least twice to create a clean, solid edge. Plastic bags often have a designated high-tack adhesive strip.
- Apply Tamper-Evident Bag Tape: Apply a continuous strip of tamper-evident security tape across the entire folded edge. The tape must extend onto the bag itself on both sides with absolutely no gaps.
- Sign Across the Seal (The Forensic Signature): This is a strict legal requirement. The collector must write their initials and the date across the seal, ensuring that the writing is half on the security tape and half on the bag itself. This creates a unique alignment that is impossible to replicate if the tape is cut and replaced.
Executing these sealing steps flawlessly creates an impenetrable physical barrier that withstands rigorous courtroom scrutiny.
Step 6: Verify Seal Integrity
After applying the security tape, conduct a rapid physical audit:
- Visual Inspection: Inspect the tape and labels for any visible gaps or signs that the seal might not be secure. Make sure that the tape has fully adhered to the evidence bag and that no part of the bag is left open or vulnerable to interference.
- Adhesion Test: Gently tug on the tape or security label to ensure it is firmly attached to the bag. If it is not securely affixed, replace it with a new tamper-evident tape or security label. A weak seal could jeopardize the evidence’s integrity.
A thorough verification ensures the evidence is fully protected and ready for secure transportation to the crime lab.
Expert Tip from Shosky Security: Building on the Adhesion Test in Step 6, remember that pressure-sensitive adhesives require 24 to 72 hours to fully cure into the bag’s substrate. Testing the seal aggressively right after application might cause a clean peel, so always allow proper “wet-out” time before heavy handling.
Step 7: Complete Chain of Custody Documentation
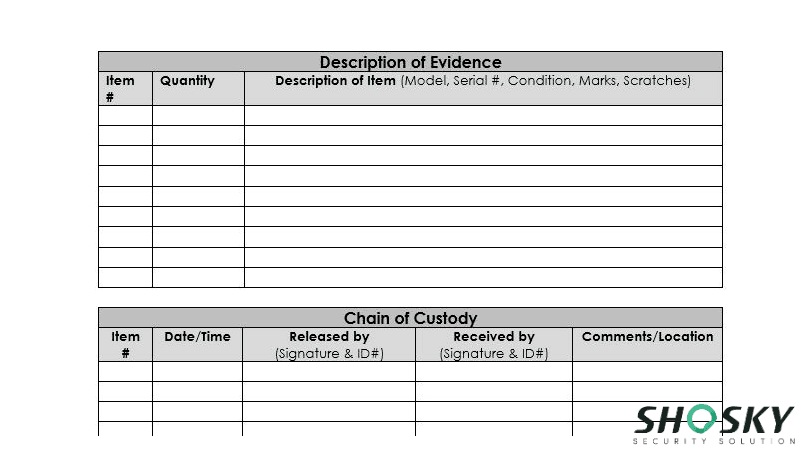
The final step is to document every detail of the transfer. The official log tracks the evidence from the moment it is collected until it is presented in court. The chain-of-custody log should include:
- A Record of Handling: This includes who handled the evidence, when it was handled, and where it was stored or transported. Each person involved in handling the evidence must sign and date the log to confirm their role in the chain.
- Log of Seals: Document the types of security labels and tamper-evident tape applied, including serial numbers or other identifying features. This allows investigators to trace back to the exact materials used to seal the evidence.
- Any Changes in Custody: If the evidence is transferred between individuals or locations, each step must be documented in the log to ensure full transparency.
Maintaining this meticulous paper trail is the only way to guarantee the collected items remain legally admissible.
Evidence Bag Handling Mistakes That Compromise Evidence Integrity

Even small oversights can lead to cases being dismissed. Forensic units must train personnel to avoid these critical pitfalls:
- Using Non-Tamper-Evident Materials: Using regular office tape or standard ziplock bags provides zero tamper evidence and instantly compromises the legal weight of the item.
- Failing to Sign Across the Tape: If an officer forgets to write their initials half on the tape and half on the bag, defense attorneys can easily argue that the tape was removed and replaced without detection.
- Cross-Contamination: Reusing nitrile gloves between items or placing multiple unlinked items from different locations into the same evidence bag.
- Breaking the Chain: Forgetting to log a transfer of custody in the chronological paper trail, even for a short duration.
To maintain integrity in the chain of custody, it’s essential to avoid these mistakes in evidence handling. Always handle evidence with care, minimizing direct contact and ensuring it is stored in a secure location immediately after collection. Keeping evidence in tamper-evident bags and using security labels ensures that any potential tampering will be immediately noticeable.
FAQs
Q1: What two things must be written across the seal of an evidence bag?
The collector’s initials (or signature) and the exact date of collection must be written permanently across the final seal.
Q2: Why is it important to write across both the tape and the bag?
Writing half on the security tape and half on the evidence bag creates a unique, irreplaceable visual alignment. If an unauthorized person slices the tape and attempts to apply a new one, the signature lines will no longer match perfectly, instantly proving the bag was tampered with.
Q3: What type of evidence bag should I use for biological samples?
For biological samples like blood or plant matter, strictly use breathable Kraft paper evidence bags. Plastic bags trap moisture, which accelerates mold growth and permanently destroys DNA evidence.
Q4: How do I know if my security label is truly tamper-evident?
An industrial tamper-evident security label will permanently display a hidden “VOID” or “OPENED” message, leave a sticky residue, or fracture into tiny, destructive pieces if any attempt is made to peel or alter it.
Q5: Can I reseal an evidence bag once it has been opened by the crime lab?
Yes, but you must never remove the original seal. The forensic technician must cut the bag open from a different side, and when finished, apply a completely new tamper-evident seal and record the new seal’s serial number in the chain of custody log.
Secure Your Chain of Custody with Shosky Evidence Bags
Ensuring that evidence is properly labeled and sealed is essential for maintaining its integrity. By taking the necessary precautions, such as using tamper-evident solutions and documenting every step, investigators can safeguard the evidence from contamination or tampering. This process is crucial for maintaining the chain of custody and ensuring the case’s credibility in court.
Protect your evidence with Shosky Security’s range of tamper-evident products. From bags and security labels to tamper-proof sealing tapes, we provide everything needed to ensure the safety and integrity of your evidence. Contact us today to discover how we can help you secure your critical materials.